Feeds:
Posts
Comments

Archive for March, 2009

This morning, a cold, sunny morning (37degrees F), I did something very unusual—I went outdoors, and I took some pictures. Here are some shots you haven’t seen of our community, taken around 8:00 a.m. with the sun low.

This is our picnic grove. See that cluster of huge evergreens above in my blog header? That’s where this grove is located, among the trees.

Picnic-grove

This rough stone stele is also located in the grove. It’s from the original use of this property as a Catholic seminary and retreat center. I haven’t been able to find out anything about this monument.

Another-stele

A closer look at it. That’s Astro-turf on the walk way–safer for elders than the rough ground here.

Stele

Nearby is another relic from an earlier time. It’s the low block of stone to the left of the plastic table.

Another-relic

From the grove you can see our residents’ garden area.

Resident-gardens

In the foreground is the putting green where grandson Noah loves to play golf. The metal stands hold clubs and balls.

Now here’s a closer view of the residents’ garden plots.

Resident-garden-plots-up-cl

Water hoses are strategically placed and the heavy work is done by staff.

Here’s the Tool Shack. Everything needed is available, even chairs. Everywhere at Charlestown, there’s a place to sit down.

Tool Shack

Beyond the garden plots is Old Charlestown, the original buildings which were brought out of retirement to become a retirement community.

Here are the magnificent weeping cherry trees in front of our historic treasure chapel as seen from the grove, early in the morning with the sun behind me.

Weeping-cherries-early-morn

And here’s a closer shot of the chapel and trees from the garden plots.

Chapel-and-weeping-cherry

When I came back into our building, through a back door, and entered the hallway, I was greeted by this seasonal decoration by one of our neighbors.

Seasonal-decor

Read Full Post »

Do you want to see why? Here is my framed practice cloth with all six different leaves stitched with the stitches called for in the chartpak.

framed-practice-cloth

I stitched these leaves with the specified silk thread and the different stitches I’ve been trying to learn. Not a single one of these leaves is acceptable. Not one. See how crude they are?

Now here are all my practice cloths.

all-leaves-practice

Reading from left to right, upper row first, you can see the approximate order in which I worked the practice leaves. You’ve seen the ones in the upper row before.  I think I even showed you the first two or three leaves stitched on the framed cloth after I thought I could do them well enough. I was wrong.

It’s not that I haven’t learned how to make the stitches. I can do nice straight rows of all the stitches, including the up-and-down detached buttonhole stitch that I so struggled to learn. Here’s where I first tried that stitch.

next-attempt

Leaf A was my first attempt at up-and-down detached buttonhole. Sadly, this is the only practice leaf on which I got the curve down the middle between the two values of green and the stitch is wrong, lots of mistakes.  See how lumpy it is? This is a stitch I invented.

On leaf B I did basic detached buttonhole to see whether I could get that curve. Nope.

At C you see detached buttonhole stitch over “metal” thread (Kreinik fine braid) foundation and at D you can see knotted detached buttonhole over the same braid foundation–threads carried across the leaf.

So I tried again, on another piece of old bedsheet.

one-to-go

The arrows point to sections of the leaves where the up-and-down buttonhole stitch looks the way it’s supposed to. But notice the holes and the denser areas. And the curve is conspicuously missing. I haven’t figured out how to add and subtract stitches at either side, maintaining the spacing evenly; and I haven’t figured out how to achieve the inside curve. Nevertheless, I went ahead and tried it on my framed practice cloth of motifs, with the other leaves.

framed-practice-cloth1

It’s very easy to see how primitive this stitching is. If you can see the numbers,

#1 is trellis stitch.

#2 is knotted detached buttonhole stitch.

#3 is basic detached buttonhole over gold braid.

#4 is up-and-down detached buttonhole stitch over gold braid.

#5 is knotted detached buttonhole where I used mostly dark green so I could just practice the stitch. It is better here than in #2, which is the same stitch.

#6 is my last attempt at up-and-down detached buttonhole. Notice that it is worked along the long side of the leaf, whereas the other leaves are stitched in rows across the length. None of these is good enough.

The curved plaited braid stitch, however, is not too bad. It’s the second attempt (on this practice cloth). Here’s the first try.

false-plaited-braid-stitch

Oh man, what a mess. I just cut right through the middle of that line of stitches and brushed the bits into my waste basket. It is virtually impossible to unstitch plaited braid stitch. I know because I have done it.

Here’s a close-up of the second attempt.

curved-plaited-braid-stitch

Not as pretty as experienced embroiderers produce, but I can live with it. And I expect I will improve with working all the curved lines of the design.

What I haven’t done is keep track of the time I’ve spent on this practice. That’s probably all to the good, as it might further discourage me. Nor have I kept track of the time I’ve just spent getting the pictures for this post. Thirty-some shots, not all at once, but a few at a time. I looked at them in the computer, then tried getting better pictures. Over and over.

I can’t tell you how many times I have been tempted to give up or how many times I have asked myself, “Why am I doing this?”  And, “Why can’t I produce good stitching?” It is VERY hard for me to give up. That is a strength, but it is also a weakness, as I drive myself too hard, always trying to do things that are beyond my skill level, always trying to do better. But this is really bad. I don’t know…..

In case you’re wondering, I am still reading physics. A commenter directed me to two books on physics and metaphysics by a physicist. I am finding them fascinating, compelling. I can’t stop that project, either.

Read Full Post »

Helping hands

Six weeks ago, Veronique sent me her Helping Hands award, which I am supposed to award to five or ten people who have been helping hands to me.

helping_hands_awardfromsneakymommy

Ever since, I have been trying to think of people to acknowledge in this way. The problem is that so many people have helped me. How do I choose? Well, just limiting the selection to those who have helped me with my attempt to learn Elizabethan stitches, I nominate

Megan at Elmsley Rose who sent me step-by-step instructions for the dratted plaited braid stitch

Mary Corbet at Needlenthread.com whose tutorial on the trellis stitch finally helped me get it

neki desu at A Movable Feast, who frequently encourages and supports my efforts

Barbara Curiel at Thinking Out Loud, who also offers positive feedback and compliments me for trying

and back to Vero, Au Fil du Jardin, who is always a supporter when I’m struggling.

Oh my goodness, I had forgotten to recognize “Tenar” of Tenar’s Cave who posted a step-by-step tutorial of the knotted detached buttonhole stitch for me.

Heartfelt thanks to all of you who have been lending me helping hands ever since I began blogging. You know who you are, and I really appreciate all the help I can get!

Read Full Post »

Well, I’ve done it. I’ve already shown you the diagram I had to work with. Here it is again:

stitch-diagram

I have really struggled with this stitch. Let me show you my practice cloth.

knotted-detached-buttonhole

I started with number 1, just stitching lines inside a rectangle. It was a bumpy beginning, on the right side of the rectangle, but on the left side, I had gotten the stitch correctly. It formed the pattern/texture shown in Jane’s photograph. Next I tried using it to fill leaf shapes. Although I was making the stitches in the same way, at least, I thought I was, they didn’t produce the same appearance. By the way, I was using DMC cotton floss on a piece of old bed sheet, so the colors are not what will be used on the design. (I’m using up a lot of old DMC floss on this project.)

Frustrated, I kept trying, over and over. Finally, I thought, it’s easier for me to stitch this stitch from left to right. I’m just going to take the thread down into the fabric on the right and start the next row on the left, instead of stitching back under the previous row. Voila! It worked. Leaf number 6 looks the way knotted detached buttonhole stitch is supposed to look. Now here’s the back of the practice cloth.

rearview-kdb-stitch

You can see where I began to carry the thread across the back, and that’s where the rows began to look like the real stitch. In this shot you can plainly see that I was working on a piece of a worn sheet.

The next practice was done on my official practice cloth, with this result:

leaf-2-practice

Worked with Needlepoint Silk on linen, it is still not good enough, but I think, I hope, I can do better on the design. Not keeping the tension uniform and adding and subtracting stitches to fit the shape has caused the holes.

While I was working all the rows from left to right, I vaguely recalled having read about that somewhere. At the bottom of the page, after she has shown a photograph of her knotted detached buttonhole leaf, Jane says this: “Technically this filling is executed with one row from left-to-right alternated with one row from right-to-left, as shown in the illustration. [the diagram above] On the model, [her photograph], all rows were executed from left-to-right only, requiring that the thread be carried across the back of the work. Also, the needle was taken through a chain link to begin and then end a row.”

Well!.

For any of you who want to learn this stitch, I highly recommend Tenar’s (pseudonym) tutorial, posted yesterday. Instead of taking the thread across the back of the fabric, she just turned the work upside down for the return row. Great photographs. Could have saved me grief, and will help me do the next knotted detached buttonhole leaf better. I get to do another one on my old bed-sheet practice cloth. Thanks, my friend.

Read Full Post »

The Baltimore Museum of Art, which has an outstanding textile collection, is featuring an exhibit of Baltimore quilts this spring. I’m sorry that you probably can’t read this photographed page from their members’ magazine. In addition to the exhibit, they are offering for sale kits of 11 different Baltimore quilt blocks and a CD-ROM with instructions for reproducing one of the quilts in the show, in its entirety. The little image at the bottom right of this page is the quilt.

bma

From their website.

Collection Highlights

BMA Quilt

Baltimore Album Quilts Revisited: A Matter of Style
Berman Textile Gallery
Through August 23

Discover quilts of various styles and quilt squares illustrating the many techniques found in album quilts of mid-19th-century Baltimore. Although the classic Baltimore album quilts are distinguished by highly complex and unique designs including wreaths, birds, lyres, and floral arrangements formed of layers of appliqué, not all achieved such a high level of sophistication. Most exhibit a combination of styles due to the many influences affecting Baltimore’s culture. These extraordinary examples of textile art enrich our understanding of the history of Baltimore and beyond.

Above: Friends of Captain George W. Russell. Detail, Baltimore Album Quilt. 1852. The Baltimore Museum of Art: Purchase with exchange funds from Gift of Edith Ferry Hooper; The Aaron and Lillie Straus Foundation; and Mrs. Frank Kent; and Bequest of Alfred Duane Pell, BMA 1971.36.1

I hope to get to the show. Maybe then I’ll be able to show you more of these magnificent quilts.

Read Full Post »

I am finding Jane Zimmerman’s $50.00 chartpak unhelpful. For each stitch, she shows only a single diagram. For example, here’s the one I’m trying to figure out now: knotted detached buttonhole.

stitch-diagram

No instructions, no step-by-step guidance. Just this.

Without the help of Linda Connors’ plaited braid stitch tutorial, I was totally unable to master that one. Without the help of Mary Corbet’s video, I was struggling with the trellis stitch. So far, I haven’t found any help for the knotted detached buttonhole stitch. Still trying to get it.

But, I have made progress. On this practice cloth, I produced a line of plaited braid stitch using the Kreinik gold braid called for by the chartpak. It is the correct 1/8 inch width line and the stitches are good.

Can anyone tell me what camera I need to show you close-up shots of this beautiful stitching? I’m using a Canon PowerShot A95.

Now for the trellis stitch. Here are my first attempts to learn the stitch:

trellis-practice

I started with the Needlepoint Silk (far right), but soon saw that that would be a very expensive way to practice, so I switched to cotton, first trying with pearl cotton #5, the better to see what I was doing. You’ve seen this practice cloth before. Here I tried stitching leaves. Not even trellis stitch! With Mary’s help, I have done these leaves:

practice-leaf-1

These are trellis stitch. It’s one thing to learn how to make the stitch. It’s another thing to fit the rows of stitches inside an irregular shape. See the holes? I still haven’t learned how to add and subtract stitches to fill the shape evenly. Nevertheless, I pressed on to my official practice cloth, with this result:

leaf-1-practice

This time I used the Needlepoint Silk, which is quite different from working with DMC cotton floss. As you can see, the leaf is still “holey.” But I think I’ve learned how to avoid that when I stitch leaf #1 on the design.

And now back to the knotted detached buttonhole stitch.

Read Full Post »

This year, grandson Matt will graduate from Case Western Reserve University, planning to go on to graduate school in physics. In 2005, he graduated from Friends School here in Baltimore. Here I’m going to show you how I made his high school graduation gift. For each of my projects, I keep a journal to document the process. So here is that journal. Is there anyone interested in reading this?

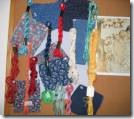
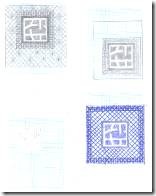
March 9, 2005. Although I’d been thinking about making a crazy patchwork quilt for Noah, even tacking clip_image002materials I might use to the bulletin board, today I began work on Matt’s graduation gift. After first fooling around with the idea of using a fractal image as the basis for stitchery, I gave that up as too complex and maybe not doable, or at least, not without a lot of experimentation. Then, out of the blue, while meditating yesterday, I got the idea of basing a design on Case Western Reserve University’s logo. I found it at their Website, printed it, traced it, and began thinking of ways to embroider it. This I think clip_image004I can do handsomely, using sadi (Do go read about sadi.) and Rajmahal art silk threads, gold and blue, or maybe gold, silver, and blue. On paper, I’ve begun playing with design and stitching ideas, researching filling stitches for more ideas.
clip_image008clip_image010

March 11. I’ve framed up a practice cloth of a silky material, ordered silks from Thai Silks, begun to prepare an order for Rajmahal, and I’m still playing with design ideas. Now it’s filling stitches for inside the logo and surrounding it. I think I’ll use a red thread somehow in the logo filling to represent Friends School.

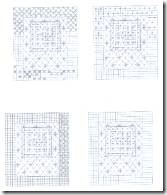
March 21. For the past ten days I’ve been working on the design, making thumbnails of various ways to surround the logo, experimenting with different values, and trying different sizes. Belatedly I thought of using graph paper for creating matrix fillings. And even later I realized that I had the scale wrong in my thumbnails, so I reduced graph paper on the computer to give me the correct scale to practice on.

Yesterday I think I settled on the final design and its size—6.5 x 7.5. clip_image012Next comes the stitching plan. I intend to stitch this piece in traditional silk and metal thread embroidery, but there are still many, many decisions to be made about colors (values, since I know it’s going to be blue and gold), weight of threads, types of gold materials, and so on. Lots of experimenting to do on a practice cloth.
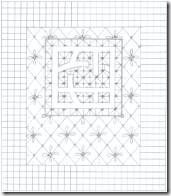
The last thing I did yesterday was to transfer half of the design to my practice cloth, on which I’d already begun trying out some matrix filling stitches–traditional stitches. The logo will be done in goldwork, but that will require testing and practice to find the technique that works best with this shape.
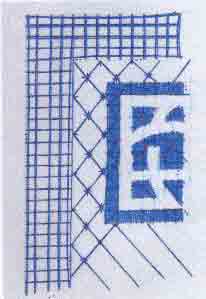
grid-practice

March 27. Now I’m stitching my practice cloth, which I’ve decided to call a study. Using the Rajmahal threads I plan to use in the final piece, I’ve been trying out my ideas for stitching—laid filling for the blue part of the logo, matrix filling for the two borders. Still haven’t decided for sure how to use red, which I want to incorporate to represent Friends School and to give added liveliness to the otherwise monochromatic color scheme. Haven’t made much progress in the past week because of a dentist’s appointment and a trip to the National Gallery of Art.

April 4. This project is going very slowly. Last week I had an ophthalmologist appointment, our mailman’s retirement party, and cooking Indian dishes for our party every day from Wednesday till Saturday. Yesterday I went to Matt’s choir concert. Now I have to settle down to work steadily on this piece.
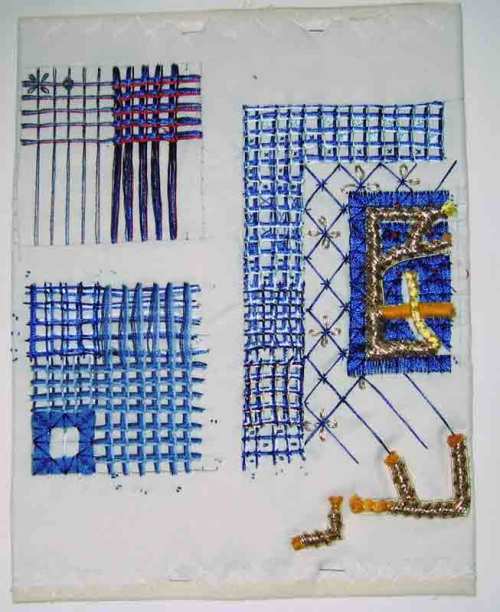
practice-cloth

After doing all these studies, I discovered that the reason why I could not get perfect squares with the three threads lined up in battlement couching is because the Rajmahal threads are too slick and slippery. When I experimented with cotton threads, the couching looked just the way I wanted it to—a shadowbox effect.
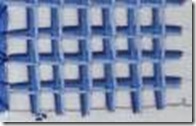
clip_image020

I also thought of a better way of stitching the outside edge of the logo—using six-strand couching. It looks much smoother than the lines of laid threads.
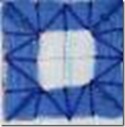
clip_image018

Cutting the sadi pieces all the same length is a challenge. The sadi is not straight, so it’s difficult to judge the length. I have decided on the size of the loops I want to make, though. Now I need to do more studies of filling stitches for the outer border. When I’ve decided on how to do that, I’ll practice the goldwork for the logo.

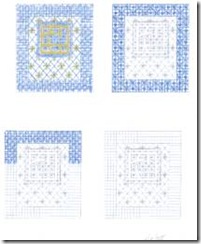
April 7. Yesterday I stitched more studies for the outer border. I prefer numbers 4 and 5 and couldn’t decide which, if either, of these I’ll use.
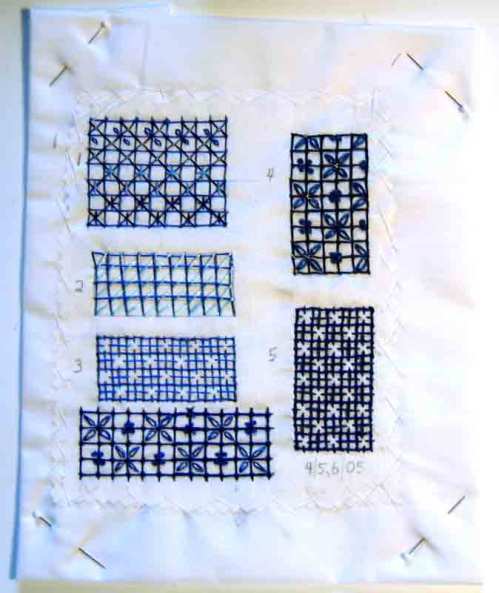
filling-variations

To help me decide, I drew thumbnails to see how my two favorite patterns would look in the whole design.
clip_image028


padding

Today I’ve begun padding the logo for goldwork. The purpose of this study is to determine what materials and how much to use for the padding under the goldwork. I’ve couched down four strands of tan craft thread and covered that with 18 strands of gold silk thread. Already I can see that the corners as I’ve stitched the padding are rounded, not as square as I want them to be. I’m going to try covering the remaining tan padding with gold felt, to see what differences there are when I attach the gold over the different paddings.

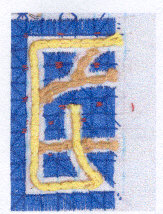
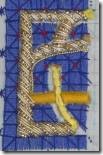
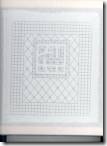
April 9. Here’s the first study in goldwork. I haven’t yet got the length of the sadi right. I think the line looks too broad. Haven’t yet decided whether to use some silver sadi in this metal work. And I have to work out which way to slant the stitches. It’s starting to look better. I tried pearl sadi as outline and decided that I like all gold better than mixed silver and gold.
clip_image032

clip_image034

April 11. Today I attached the foundation fabric and the ground fabric to the frame and transferred the design. I’m still not satisfied with the technical aspects of the goldwork, nor am I sure of the pattern for the outer border, but I will work these out, maybe with more studies, as I proceed. I’ve learned to keep going, even when I lack confidence.
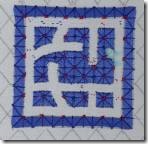
clip_image036April 14. I’m not satisfied with the red accents and am going to unstitch them.

clip_image038The reason why I was dissatisfied with the red stitches is because I screwed up when I drew the center matrix. I intended to have “a” and instead I drew “b”. Oh well, it won’t spoil the final effect. I used dark blue to create the accents.

April 21. The Japanese use temporary holding stitches to keep long laid stitches in place until the permanent matrix stitches are put down. Then the temporary stitches are removed. I didn’t think to do that with the long stitches in the logo. Consequently, they didn’t stay in straight lines as I put the matrix stitches over them. Lesson learned. I’m learning a lot from doing this piece.

I used 18 lengths of DMC dark gold cotton floss for the padding. That was exactly the amount of padding needed. However, the goldwork in the logo does not satisfy me: there are broken and misshapen purls; not all the purls are the same length; in one place the padding was not as heavy (some threads pulled out and I thought it wouldn’t matter) and so the line of goldwork looks a little skimpy; and the corners are not perfect. But it doesn’t look bad enough for me to feel I have to do it over. To the untrained eye, it will look spectacular. Only I will know how much better it could be.

April 24. With the sadi purl and the Rajcord outlines in place, the laid threads look okay. I can detect only two gaps that I may be able to fix or compensate for.
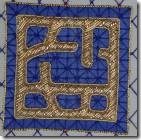
clip_image040

The first sadi loops I made (lower left) are uneven. After doing them, I worked out a technique to cut all the purls the same length and to attach them without inadvertently pulling the thread too tight, thus breaking or distorting the purls. I’m pleased with the last three I did yesterday.

clip_image042

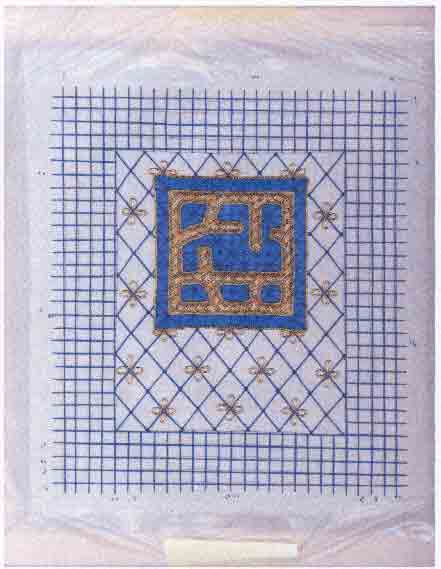
April 29. The grid lines in the outer border have not been stitched down yet, as I’m still deciding whether they should be heavier, have more threads added.
grid-copy

I’m also still experimenting with various ways of adding filling stitches. Here  is one study worked on the grid– using three strands of silk for the grid.

clip_image046

I’m having trouble controlling the multiple strands of silk in the lazy daisy stitches and the French knots. In addition to trying different numbers of strands of thread, I’m also going to try using a different needle, a straw or milliner’s needle, which may work better with the French knots.

I had to stitch some of the gold loops in the inner border several times to get them right. Some of them are still a little irregular. I may decide to redo them when I’ve finished the outer border, before framing it. Precision is part of the beauty of this kind of work, not my forte! But an irregular kind of design would not work with the Case logo. Or at least, this is the design I came up with that I liked best. So I have to stitch it appropriately. If I’m unable to master a technique for this filling stitch pattern, I’ll have to go to a different pattern.

May 2. After experimenting with four threads in the milliner’s needle and different stitches, I settled on six strands and drew a grid for practice. I also used the tekobari to separate the strands so they would lay smoothly parallel. What a difference! This study is much prettier than previous ones.

clip_image048

I’ve finally got it—the material, the tools, and the technique—stitching very slowly and shaping the lazy daisies and French knots with the tekobari and my fingers as I slowly pull the thread through. Now I’m back to working on the final piece, adding three strands of thread to the grid lines, which I will stitch down with cross stitches in three strands of 126, to match the lines. The lazy daisies and French knots will be in 122.

May 9. Looks like I’m going to run out of 122, so I’ve ordered more. I had just enough of 126, but ordered more just in case. I’ve almost finished stitching the outer border and have definitely decided to replace some of the gold loops. I’m also going to add a line of six strands of 126 couched between the inner and outer borders. The frame is assembled and looks great against the embroidery.

May 18. While waiting for the threads to arrive, I replaced eight of the gold sadi loops. By the way, the red I wanted to incorporate for Friends School is in the center of those gold loops. Today I finished Matt’s gift. It’s all framed and ready to give. It took 90 hours to complete this project, 16.5 hours of that on design.
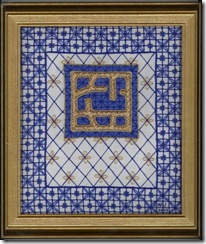
clip_image050

A better shot on Flickr.

Read Full Post »

Videos

The videos that were not uploaded in the previous post are there now. Just in case you’re interested.

Read Full Post »

Again I say, my physics study is on hold. My Elizabethan embroidery practice is on hold. I felt compelled to respond to a message from grandson Luke about comparative religions. Very few, if any of you, will be interested in this response, but here it is for any who are interested.

I sent him this introduction to a video I made showing him books that have been important to me on my spiritual journey.  Warning: the two-part video is nearly half an hour long.

World Religions (the outer forms) and

World Spirituality (the inner experience)

I have been motivated to study comparative religions at two critical junctures in my life: first, in the 1960s when I was rejecting the church in which I had been brought up, and second, when I succumbed to this neurological disorder I’ve had since 1992.

At college in the mid-60s, I took a Comparative Religions course with a dull and uninspiring professor, near his retirement. Although his course focused on the exoteric forms of world religions—Zoroastrianism, Islam, Hinduism, Buddhism, Judaism, and Christianity, and his lectures were boring, I went far beyond the syllabus and read not only about the religions, but also their sacred writings. I reached the conclusion that, despite differences in beliefs, practices, customs, and other cultural baggage, all these religions had developed in the same way: A great, spiritually enlightened individual taught what he knew (always men, of course, although there have been highly enlightened women throughout history) and disciples and students gathered around him. Understanding only part of his teaching and often lacking his direct personal experience of Spirit, they became teachers themselves. Their students understood only part of what this first generation of teachers taught, and so on. In every religion, certain elements were written and accorded status as divinely-inspired truth, and certain rituals became orthodox, required of adherents. Germs of the original insights of the first teacher were contained in all of these religions, but the institutions that grew around them were more political and social than deeply spiritual.

At the same time, I met William Blake, who has been my most influential spiritual teacher. I hope you will get around to reading my essay, “Why Blake is Important to Me”, because it is mainly the story of my spiritual journey. It’s also better written and more interesting than my old college papers.

The following 30 years after college were filled with career, family, and civic activities. In the 1980s, the New Age at its height, I read a lot of spiritual books, many of not much value. But I also encountered Buddhism in living practitioners and writers, as well as shamanism and feminist spirituality. I even participated in a Christian-Buddhist Meditation Conference in Boulder in 1984 or’85. But I did not sustain any religious or spiritual studies or practices.

Only after I was forced to retire and live in seclusion in 1993 did I begin intense and serious searching for a spiritual path I could adopt. I read many, many more books than I now own or can remember. Twice I have had to downsize my library for space reasons, and lost lots of books in that way. Without income, I depended mainly on the library for books, taking copious notes before returning them, buying only those I couldn’t find through Inter-Library Loan and those I felt I had to have for reference. I continue this practice now—borrowing a book from the library before deciding whether I want to own it. The books I will show you are only a selection of the books I own, and the books I own are a small fraction of those I’ve read.

I think Huston Smith’s books are among the best on world religions.

Among the religious traditions I have learned about that are not represented in my library are shamanism, voudon (a syncretism of Roman Catholicism and African practices developed in the Afro-Caribbean, especially Haiti, vulgarly known as voodoo), African, and Native American ones. Of these last I most remember Black Elk Speaks: Being the Life Story of a Holy Man of the Oglala Sioux and Buffalo Woman Comes Singing, by a contemporary woman, Brooke Medicine Eagle.

It was Geoff who first got me interested in Buddhism, after he spent several months in India, at a meditation retreat, and Nepal; and it was Geoff who introduced me to shamanism and voudon, both of which involve drumming. I have also spent three years as a student of Rosicrucianism, a once-heretical form of esoteric Christianity from the 16th century. I know nothing at all about shintoism.

What most interests me is not the exoteric form of religions, but the esoteric teachings and practices—the mysticism and profound wisdom, the deep inwardness. There I find much common ground—universal experiences and insights of the mystics of all traditions. Mysticism is a word that is often used pejoratively, connoting something mysterious and perhaps flaky. I try to avoid it in most circumstances. To me it means creative vision—as June Singer puts it, Seeing Through the Visible World and as Blake puts it, “inward into the realms of Eternity.

Not an adherent of any religion, I think of myself as a contemplative. I walk my own path. Still, I am greatly influenced in my own practice by Buddhist teachings and by the Bible and the Christian tradition. Not only was I brought up in a practicing Christian family, but our Western culture is shaped by and permeated by Judeo-Christian thinking, as well as Greco-Roman. Both our arts and sciences are deeply rooted in Christian soil and Christian mindset.

And now to some of the books that have most influenced me. How shall I begin?

Addenda

The lost gospels were found in Egypt as part of the Nag Hammadi Library, scrolls preserved in clay pots.

Martin Buber was a Hasidic Jew.

Bede Griffiths was a Roman Catholic monk.

Thomas Merton wrote his Master’s thesis on William Blake.

Clarification

I should have said that Joseph Campbell speculated that the development of humankind may be going in the direction of individual, personal, spiritual practice, rather than depending on organized religions for spiritual life.

Read Full Post »

Paper dolls

My physics study is on hold. My Elizabethan embroidery practice is on hold. Instead, I’ve been playing with paper dolls.

In January 7-year-old great-granddaughter Aly asked if I would participate with her in a school project. (Her mother said I was the first and only person she thought of to ask. Who can refuse THAT?)

Here’s Aly with her mom Melissa and sister Lilly.

family

This project is intended to encourage reading and writing letters (how antiquated!). It’s called Flat Stanley, who was the character in a book of that name published in 1964. In 1995 a Canadian teacher conceived of the project. You can read all about it here.

A few weeks ago, I received from Aly a letter with the paper doll she had made named Flat Stanley.

flat-stanley

I am supposed to take Flat Stanley places with me, photograph him there, and write a letter back to Aly with the photographs and Flat Stanley. Of course, Stanley was hungry when he got here, so the first place I took him was to the kitchen.

in-the-kitchen

As a feminist, I could not let Stanley have all the fun. Girls can travel and have adventures, too. So I made a Flat Aly, using a photograph of the real Aly for her face.

flat-aly

Then I made her some clothes.

pants-set

blue-dress

sweater-set

The ideas for her clothes came from Old Navy, online, so that Flat Aly can be au courant.

This project has taken me back to my childhood. Though I never played with dolls, I loved paper dolls. Not playing with them, but creating clothes for them. Since the paper dolls were glamorous women, I made glamorous clothes for them. I’ve had just as much fun making clothes for Flat Aly.

Next I will be choosing places to take Stanley and Aly. Stay tuned for the adventures.

Read Full Post »

Older Posts »